

How To Draw A Fist Bump
How to depict a fist in the two almost reasonable options will be discussed in this article! The fist is the gesture shaped when the fingers and pollex are bent inwards into the palm. What does this gesture indicate in conditions of a nonverbal message?Would yous like to draw a fist?
This simple, step-past-footstep drawing lesson will assist you in using natural lines and geometric shapes to do just that. All yous will require is a pencil, a sail of newspaper, and an eraser. Yous may as well wish to apply crayons, colored pencil, markers, or paints to shade your entire drawing.
First, you crave to make employ of just a simple pencil. This is one of the most appropriate devices for learning the fundamentals of art. How to draw a fist easy and straightforward step-by-step examples wakes told here! You will require a lot more white harsh paper and a soft eraser.
The nearly critical indicate is desire, perseverance and likewise believe in one's very own toughness. If yous are figured out to start after that go on to exercise and also learn exactly how to attract a fist with a book stages.
Drawing a fist (Option one)
Pace ane

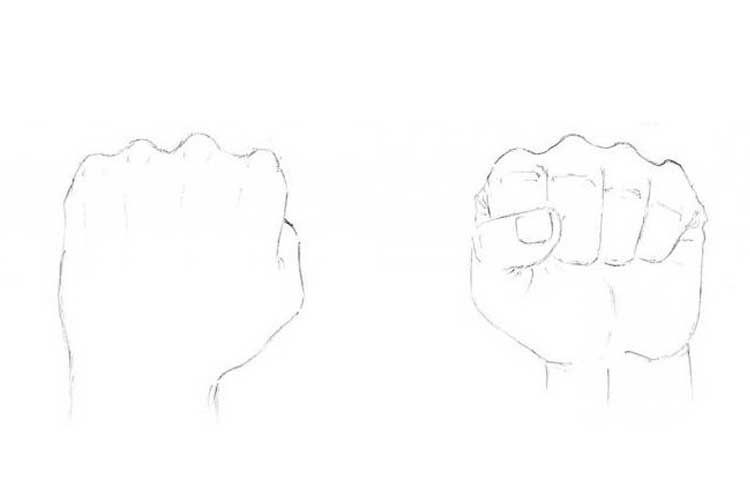
Essential describes Immediately determine precisely how to concenter a fist ahead and also behind. To practice this, we brand use of paper two trapeziums next to information technology. On the side, at the cease of each of them, draw the triangular, as in the example listed below. These are the shapes of future thumbs. Identify four directly ovals along the leading line of the figures to portray the joints. The illustration left wing is a clenched fist at the back, and on the right is the clenched fist at the front. As a outcome, the number on the correct is supplemented with upright ovals, which schematically bespeak phalanges of the fingers.

Step 2

Give assurance to the shapes With a smooth moving ridge, connect the horizontal ovals (joints) of each manus. On the sides, form your thumbs, not neglecting the nail plate. At this stage, the photo has currently come to be much more than clear; the contours have gotten the shape.
Step 3
We provide the picture show realistic expect After we have improved the illustration, our analogy is most all set. It remains to make the last touches: get rid of all unnecessary lines with the eraser, conspicuously attract the primary describes, add shadows in the right places. If y'all did every little thing right, then your job will undoubtedly resemble the drawing of the musician listed below. Now you know how to draw a paw like.
Every bit you lot can encounter, this can be done in but three actions. The job is and then primary that even a child can handle information technology. After the pace-by-pace lesson, yous can try out the position of the hand squeezed right into a clenched fist, with its size and angle. Each time the sketch will look different, and yous'll finally brand sure you understand just how to depict a fist.
Conclusion
No matter what you lot repaint, the critical point – practice daily as well as hard. Bring a note pad and a straightforward pencil for illustrations besides as sketches from life, observe detailed workshops from professionals, look for your style. When you feel that your hand has ended up beingness harder, most likely to the color style of visuals drawings. Do non hesitate; soon your job volition bring you fulfillment and besides delight others.
How to describe a fist(Option two)

I recollect you will non be surprised by the fact that it is challenging to draw hands, even experienced artists sometimes go in trouble with drawing this part of the body. I want to evidence you how to describe a fist with a pencil hands, and I think this easy step-by-step method will aid you get a bit more than experienced.
Footstep 1

We outset to draw a fist with such a figure. Nosotros will endeavour to draw a fist from the side, equally if in contour.
Step 2
 If y'all succeed, then continue. Now we will gradually describe a curved line connecting these lines like this. Information technology volition be bent fingers.
Step three

Now in the middle of the resulting effigy, we draw 2 lines like this.
Step 4

Now nosotros need to slightly conform the resulting lines to make the fist await natural.
Step 5
Add shadows, folds, boosted strokes and lines that will give the fist blueprint realistic. This is what should happen in the stop.
Now you know how to draw a fist with a pencil in stages, and I hope that a step-by-step drawing lesson with pen helped you.

Source: https://drawnbyhislight.com/how-to-draw-a-fist
Posted by: fergusoncend1944.blogspot.com
0 Response to "How To Draw A Fist Bump"
Post a Comment